🐳 Scalable Docker Ecosystem with Buddy2020-04-02

This guide will explain how to build and deploy the same Docker image on multiple machines in a scalable way. This is the direct followup to our introductory guide to Docker which depicts how to Dockerize an application, build the image, and run it in a single environment.
Actions used in this guide:
What is Docker registry
In order to deploy images, we need to build them and push them to the so-called Docker Registry. According to the official Docker documentation, the Registry is a stateless, highly scalable server side application that stores and lets you distribute Docker images. There can be different types of Docker registries: from the most popular like Docker Hub, Google GCR, and Amazon ECR, to Azure to private registries on custom servers.
Benefits of using Docker registries
You should use a registry if you want to:
- have full control over where your images are being stored
- fully own your images distribution pipeline
- integrate image storage and distribution tightly into your in-house development workflow
Incoming users looking for a zero-maintenance, ready-to-go solution are encouraged to head over to Docker Hub which provides a free-to-use, hosted registry. The service also provides 1 free private repo, which is exactly what we need for the purposes of this article.
Configuring delivery to registry
Let's create a delivery pipeline that will build a Docker image on every change in our branch, push it to the registry, and pull and run it on selected machines. Here's how it looks broken into steps:
- Wait for push
- Trigger delivery pipeline
- Build Docker image
- Push image to registry
- Log in to target machine
- Pull image from registry
- Run image on server
We'll show you how to break the entire process to a single pipeline in Buddy.
Docker delivery in Buddy
Create Git project on Buddy
Sign up to Buddy with your Git provider or email and create a new project. Make sure to select Buddy as the hosting service:
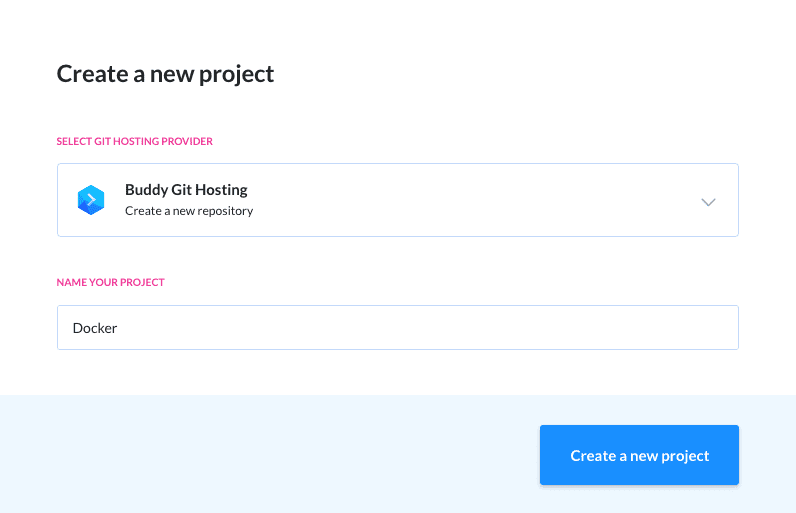
Creating a new project in Buddy
Once created, clone the project locally:
$ git clone https://app.buddy.works/yourname/yourrepo $ cd yourrepo
Build Docker image
With the project set up, let's make something that Docker can build. Create src/index.html with some placeholder HTML code:
<!doctype html>
<html>
  <body>
    Hello World
  </body>
</html>
Now we need to create a Dockerfile with NGINX that will serve the static HTML:
FROM nginx:latest
WORKDIR /usr/share/nginx/html
ADD src .
Let's build a Docker image of it and check if it's working:
$ docker build -t buddy .
$ docker run —name buddy -p 3000:80 buddy
This will map the container's port 80 to the localhost's port 3000. You can change 3000 to anything else if there's something else already running on this port. Now, open http://localhost:3000 in your browser and check if you can see the Hello World page that we created before.
You can stop the container now:
$ docker stop buddy
With everything working properly on our machine, we can commit & push the code to the remote on Buddy:
$ git add .
$ git commit -am 'Init'
$ git push origin master
Configure Docker build
Once the code has been pushed to Buddy you'll see a prompt to create a pipeline:
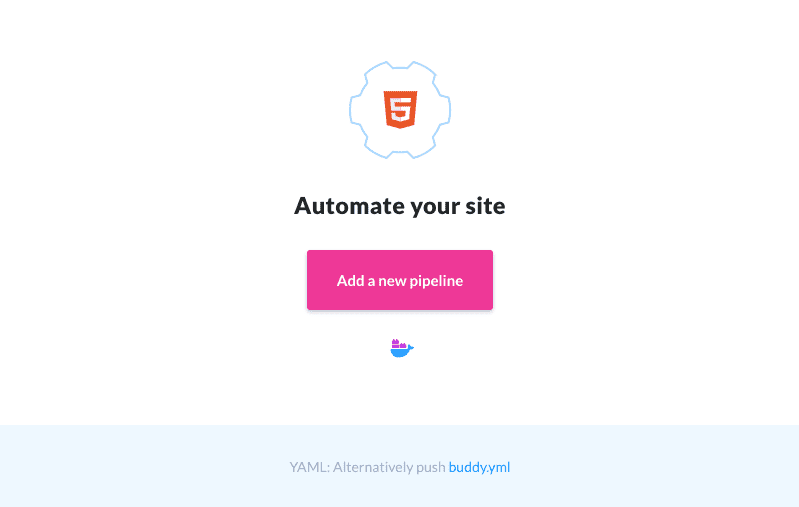
Adding a new pipeline
Click the big button, and fill out the form. Make sure to set the trigger mode to On push:
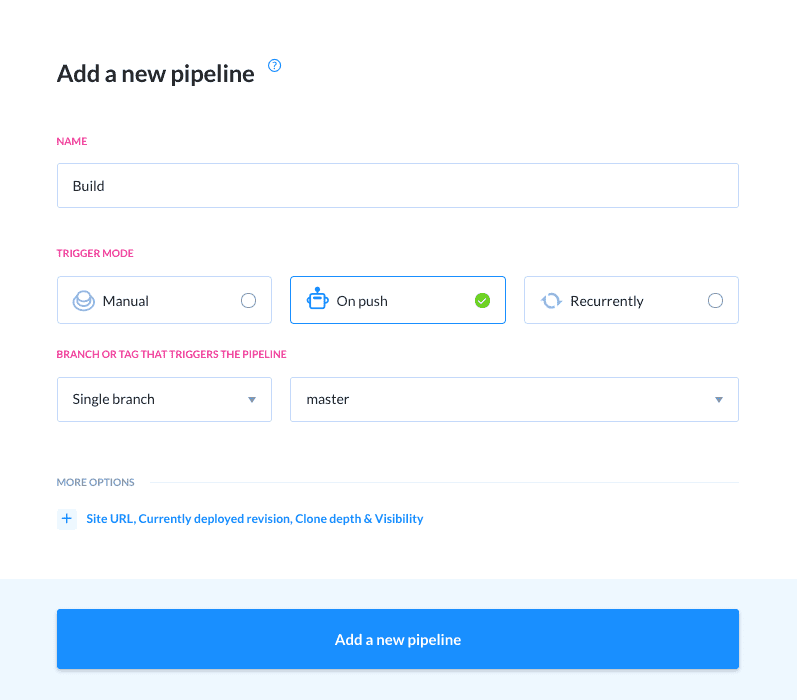
Pipeline configuration
Now we need a registry to which we'll push our Docker image. Sign up at Docker Hub, create a new repository and fill out the form.

Creating a new Docker repository
Now let's get back to Buddy and add some actions to the pipeline. The service will courteously suggest adding the Build Docker image action, as it already detected a Dockerfile in your repository:
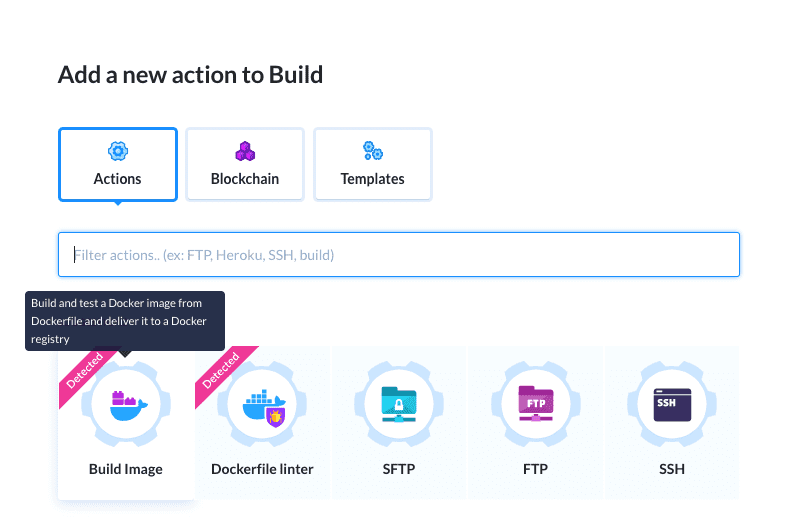
Suggested actions
Add the build action and switch to the Options tab. Here you can configure the Docker registry to which we'll push our image. Select Docker Hub as the host and fill in your repository details:
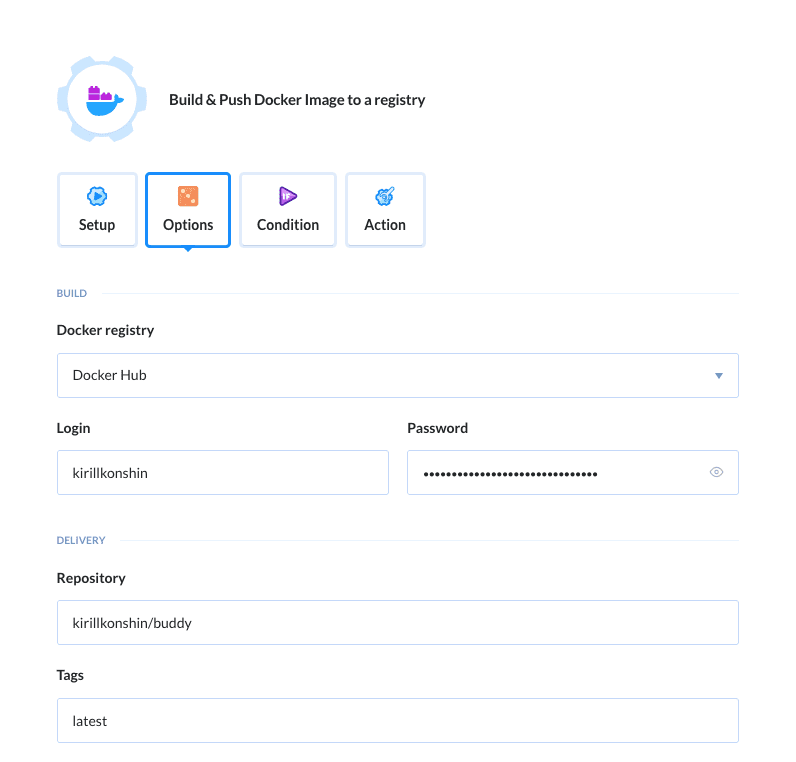
Docker Build action configuration
Now it's good time to check if everything's working as assumed. Make a push your repository or click Run pipeline to trigger the build. The output will look like this:
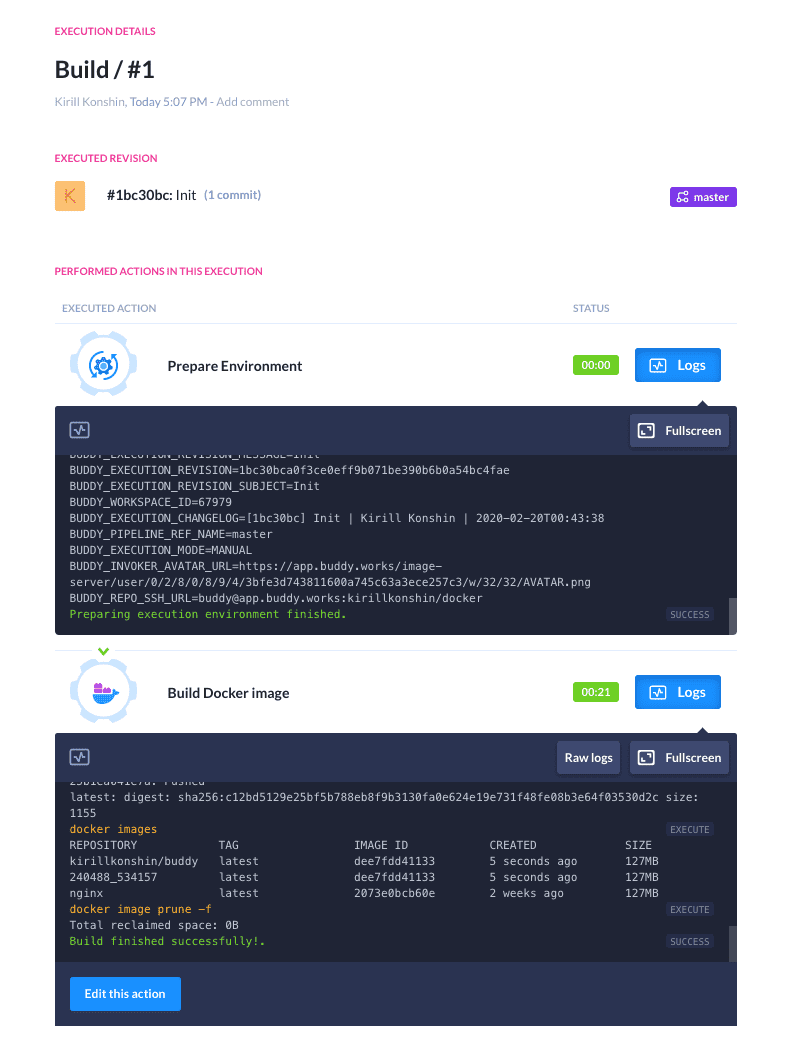
Execution details
The results of the build are also available in the Tags tab of the the Docker Hub service:
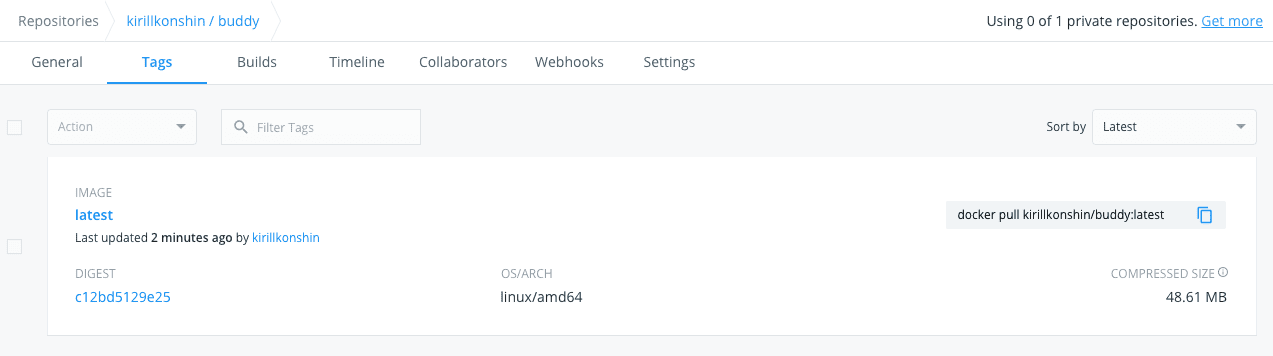
Docker Hub repository
Prepare target server
Now, we are ready to deploy the image. Before we can do that, however, we need to install Docker on your target machine. First, we need to SSH into it:
$ ssh root@your-domain.com
Once connected, install Docker using the instructions from this site. If you are using Ubuntu, you can follow the commands below:
$ apt-get update -y
$ add-apt-repository "deb [arch=amd64] https://download.docker.com/linux/debian $(lsb_release -cs) stable"
$ curl -fsSL https://download.docker.com/linux/ubuntu/gpg | sudo apt-key add -
$ apt-key fingerprint 0EBFCD88
$ add-apt-repository \
   "deb [arch=amd64] https://download.docker.com/linux/ubuntu \
   $(lsb_release -cs) \
   stable"
$ apt-get install -y docker-ce docker-ce-cli containerd.io
Full instructions on installing Docker on Ubuntu are available here.
The last step is logging into Docker Hub and providing it with the required credentials:
$ docker login
Configure deployment
Once the preparation is done, get back to Buddy and click + below the Docker build action to continue building the chain of actions in the pipeline:
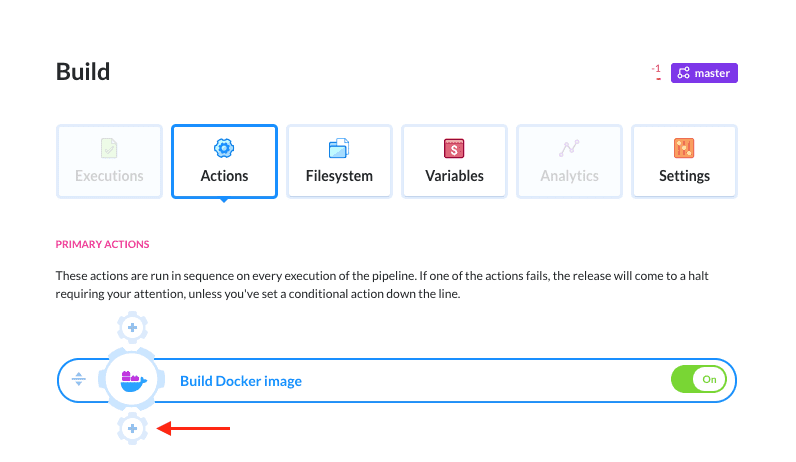
Adding a new action to the pipeline
Look up the SSH action. We'll use to connect to the machine and pull and run the Docker image:
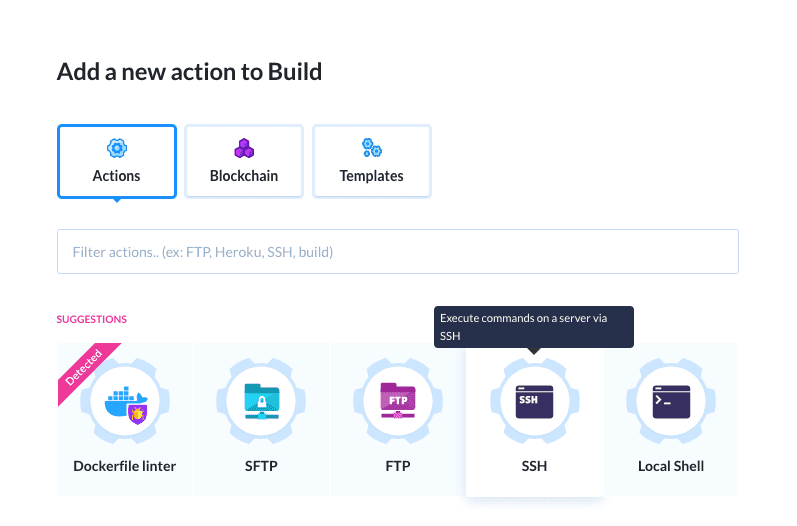
Adding an SSH action
Fill out the form using the following Bash script. This will pull the newly built image to the server, stop the container and run it again with the detached flag (e.g. as a daemon):
$ docker pull kirillkonshin/buddy:latest
$ docker stop buddy || echo 'Already stopped'
$ docker rm buddy || echo 'Already removed'
$ docker run -d -p 80:80 --name buddy kirillkonshin/buddy:latest
The filled-out form should look like this:
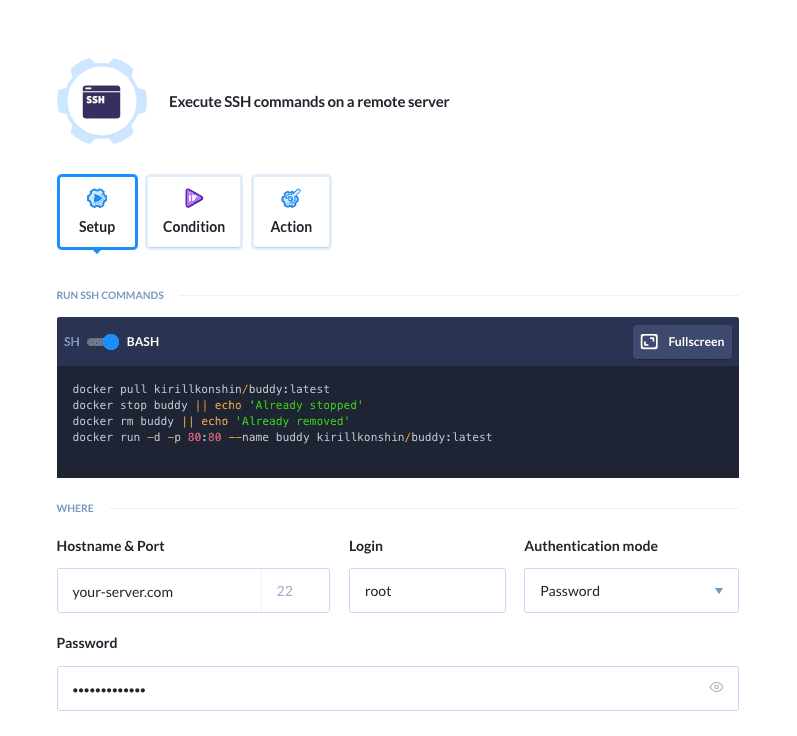
SSH action commands
Testing the pipeline
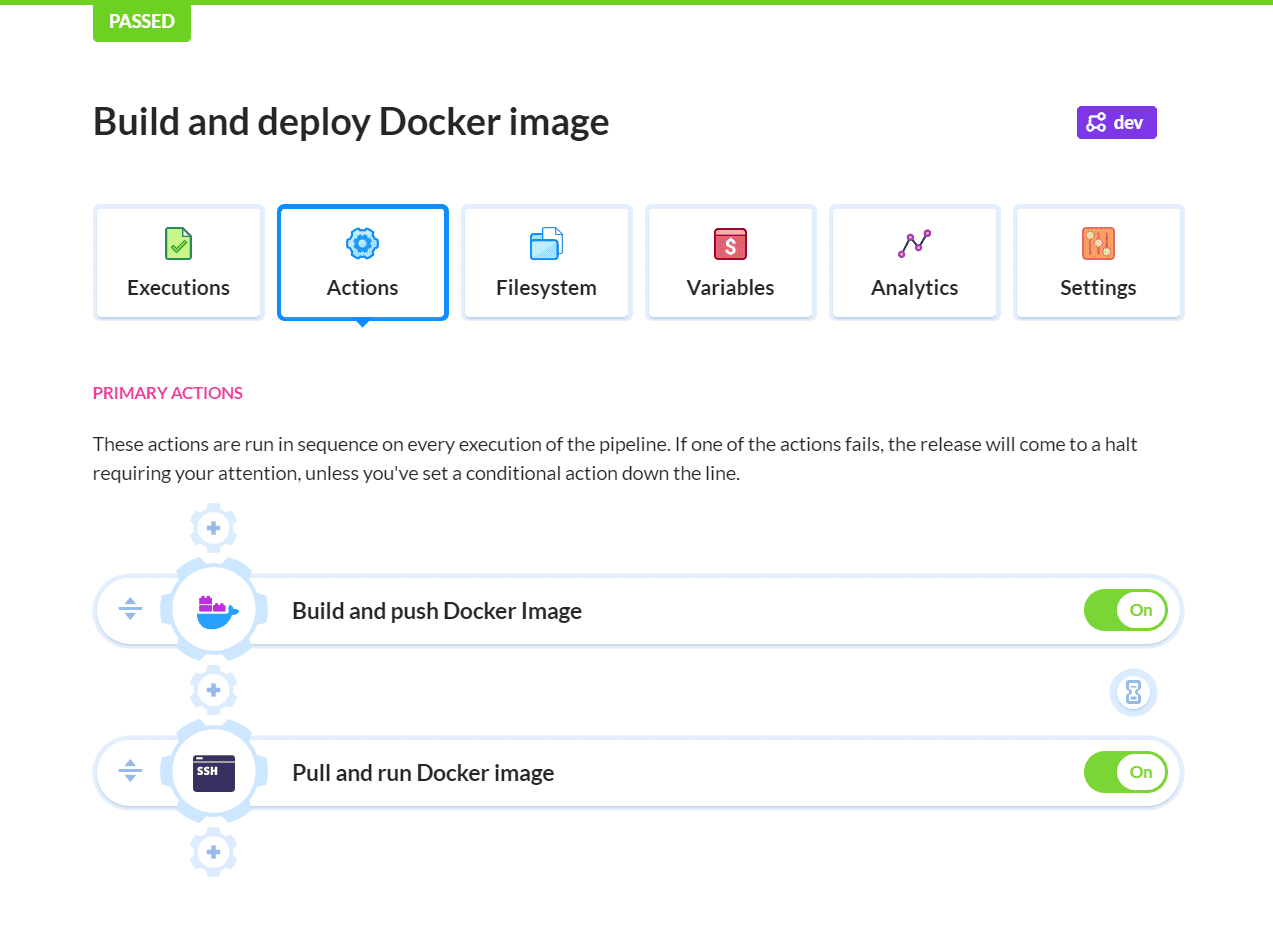
Now you can test your pipeline again. Make some changes to the HTML and commit them to the repository. Buddy will automatically pick up the changes, update the Docker image, push it to Docker Hub, and run it on your server:
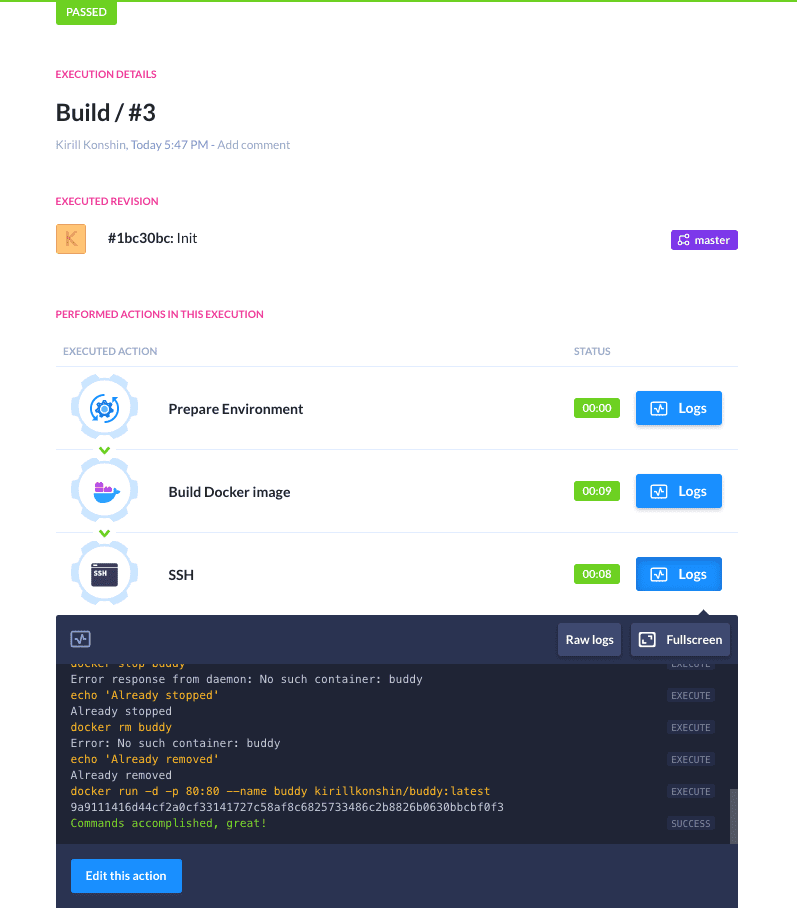
Execution details
Scaling deployment
As you can see, now the overall process is much more streamlined, Buddy builds and pushes, the target machine just runs images. This separation of concerns contributes to the stability of the overall system, as errors that may happen on each stage can be captured and addressed easier. Employing registry is great if we are running the same application on several machines, as it allows to perform the upgrade on all of them at once.
All you need to do is duplicate the SSH action and fill it with credentials to individual machines:
Execution details